Contents
Anaplan token
To work with Anaplan, you first need to get an authorization token. Authorization documentation is described here. You can get a token in two ways: by passing a username and password, using certificates. The first method is not very suitable for building integration processes, so I used certificates that can be requested from Anaplan administrators
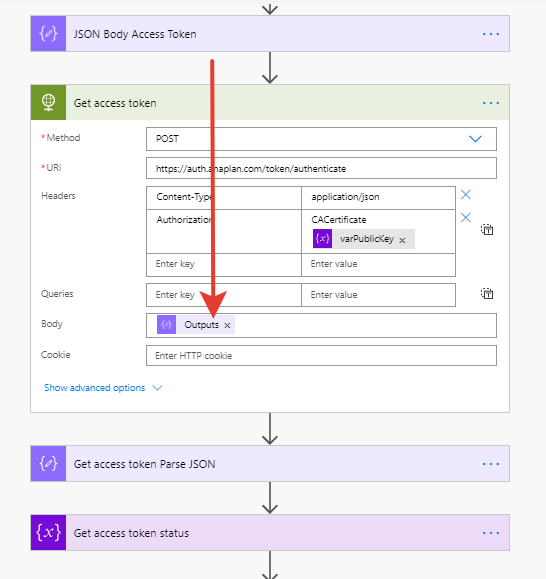
To receive a token using a certificate, you need to send a request with parameters to the address https://auth.anaplan.com/token/authenticate
Headers
Authorization:CACertificate { your_CA_certificate }
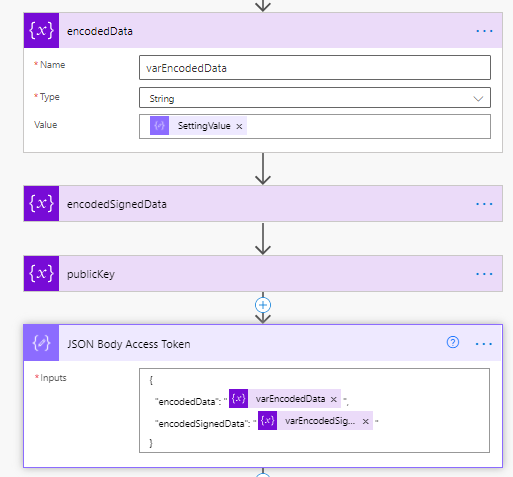
Body
{
    "encodedData": { encoded_string },
    "encodedSignedData" : {encoded_signed_string}
}
your_CA_certificate – public key from PEM file without new line characters.
encoded_string – value should be a randomly generated base-64 encoded string of at least 100 bytes
encoded_signed_string – value is the {encodedString} value that has been signed by the private key and then base-64 encoded.
Here are several examples of generating those keys in Java and Python . I wrote special console application to generate keys in NET.
How to get your_CA_certificate, encoded_string and encoded_signed_string in Flow? For these purposes, you can write a web service that will be called from Flow, but since certificates will rarely change, I put them in a SharePoint list, from where they are substituted into the authorization request.

Anaplan authentication in Power Automate
Now we can write an authorization Flow
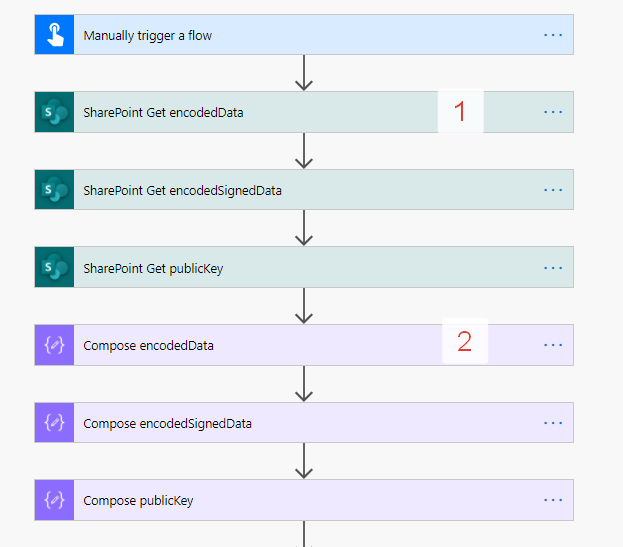
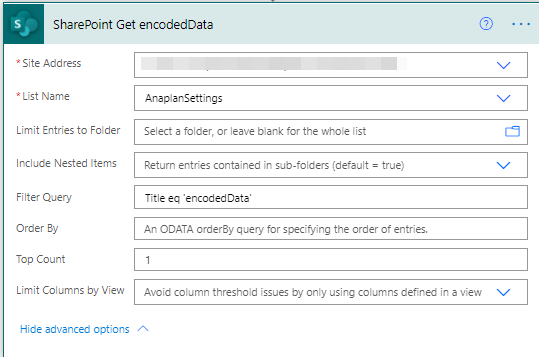
1 – Getting keys from SharePoint
2 – Get first value from SharePoint request
first(body('SharePoint_Get_encodedData')?['value'])

Next, we assign the variables a value from the SharePoint settings and initialize the body of the authorization request.
Finally, we send an authorization request and get the status.
Example of authorization response.
{
  "meta": {
    "validationUrl": "https://auth.anaplan.com/token/validate"
  },
  "status": "SUCCESS",
  "statusMessage": "Login successful",
  "tokenInfo": {
    "expiresAt": 1611513578444,
    "tokenId": "9fbeffb3-5e6e-___",
    "tokenValue": "HCWJKCg194l+EzHwrixcEo/Ygy4Q4WE=____",
    "refreshTokenId": "9fbeffb4-____"
  }
}

{
    "type": "object",
    "properties": {
        "meta": {
            "type": "object",
            "properties": {
                "validationUrl": {
                    "type": "string"
                }
            }
        },
        "status": {
            "type": "string"
        },
        "statusMessage": {
            "type": "string"
        },
        "tokenInfo": {
            "type": "object",
            "properties": {
                "expiresAt": {
                    "type": "integer"
                },
                "tokenId": {
                    "type": "string"
                },
                "tokenValue": {
                    "type": "string"
                },
                "refreshTokenId": {
                    "type": "string"
                }
            }
        }
    }
}
The token is valid for 30 minutes.
In the next article I will describe the process of getting files from Anaplan in Power Automate.
--Andrey Paltusov--
comments powered by Disqus